

How to add it
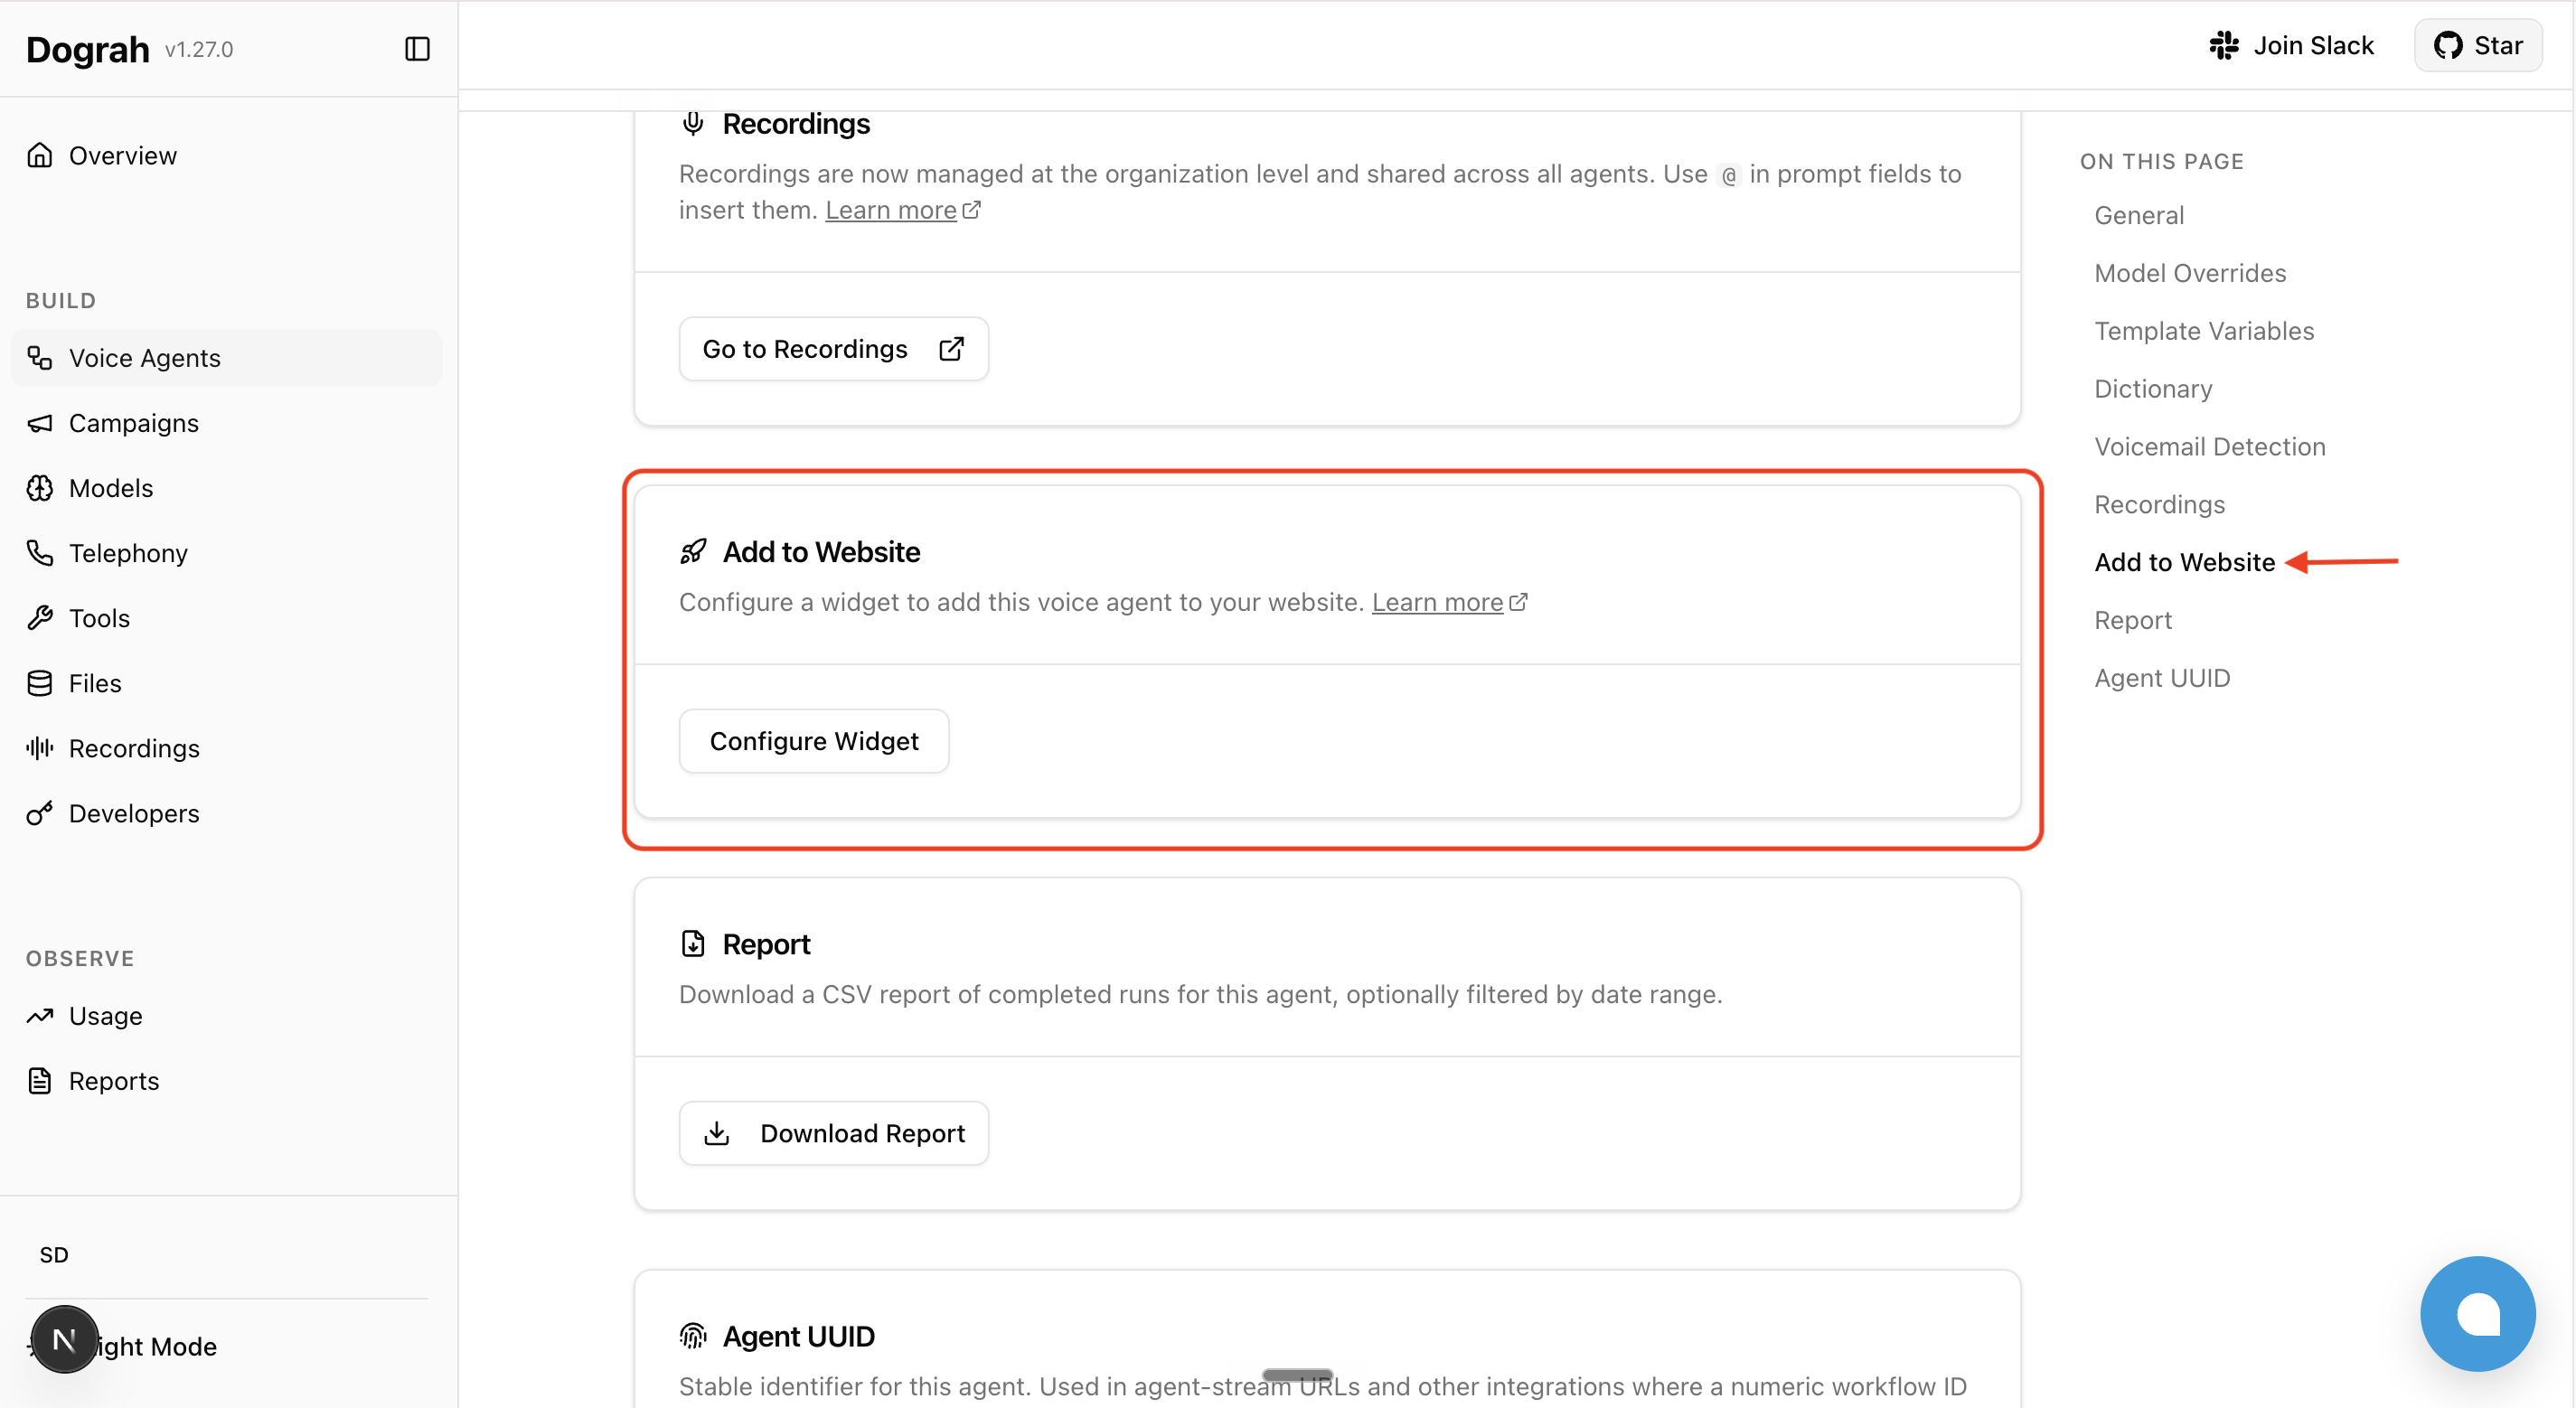
Add your voice agent to any website using the Configure Widget dialog in your agent’s settings. Step 1: Open the agent settings by clicking the gear icon in the top-right of the agent editor.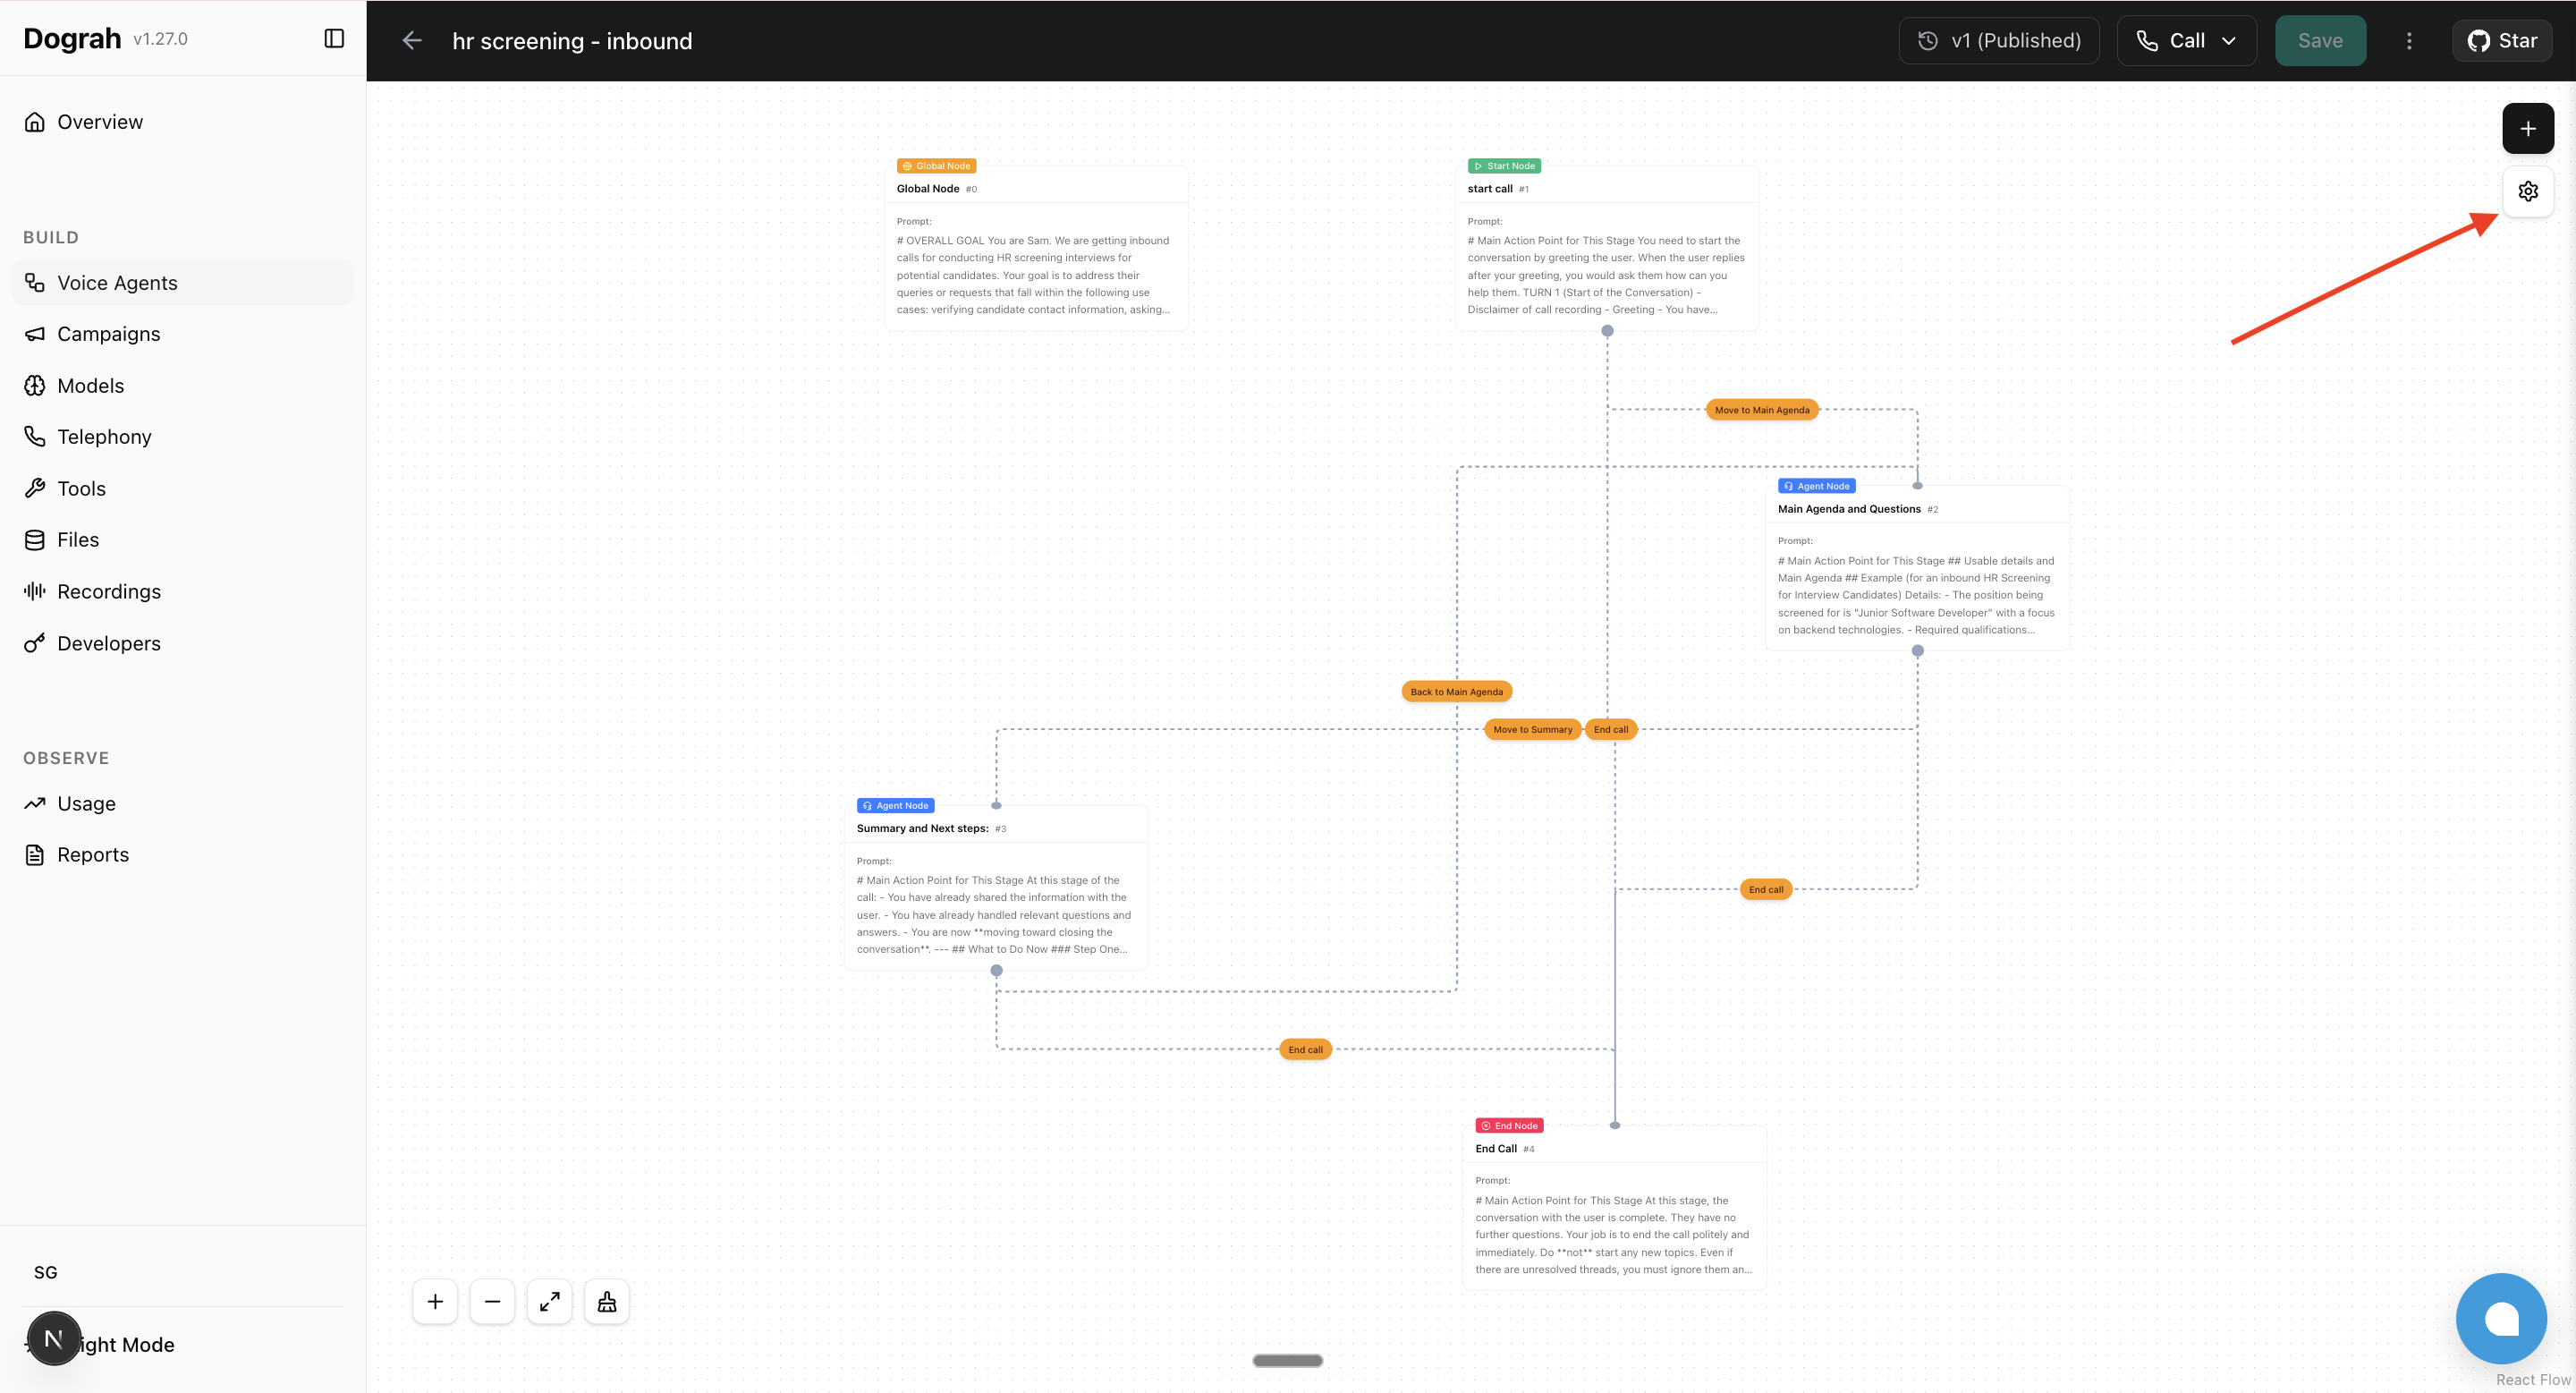 Step 2: Scroll to the Add to Website section and click Configure Widget.
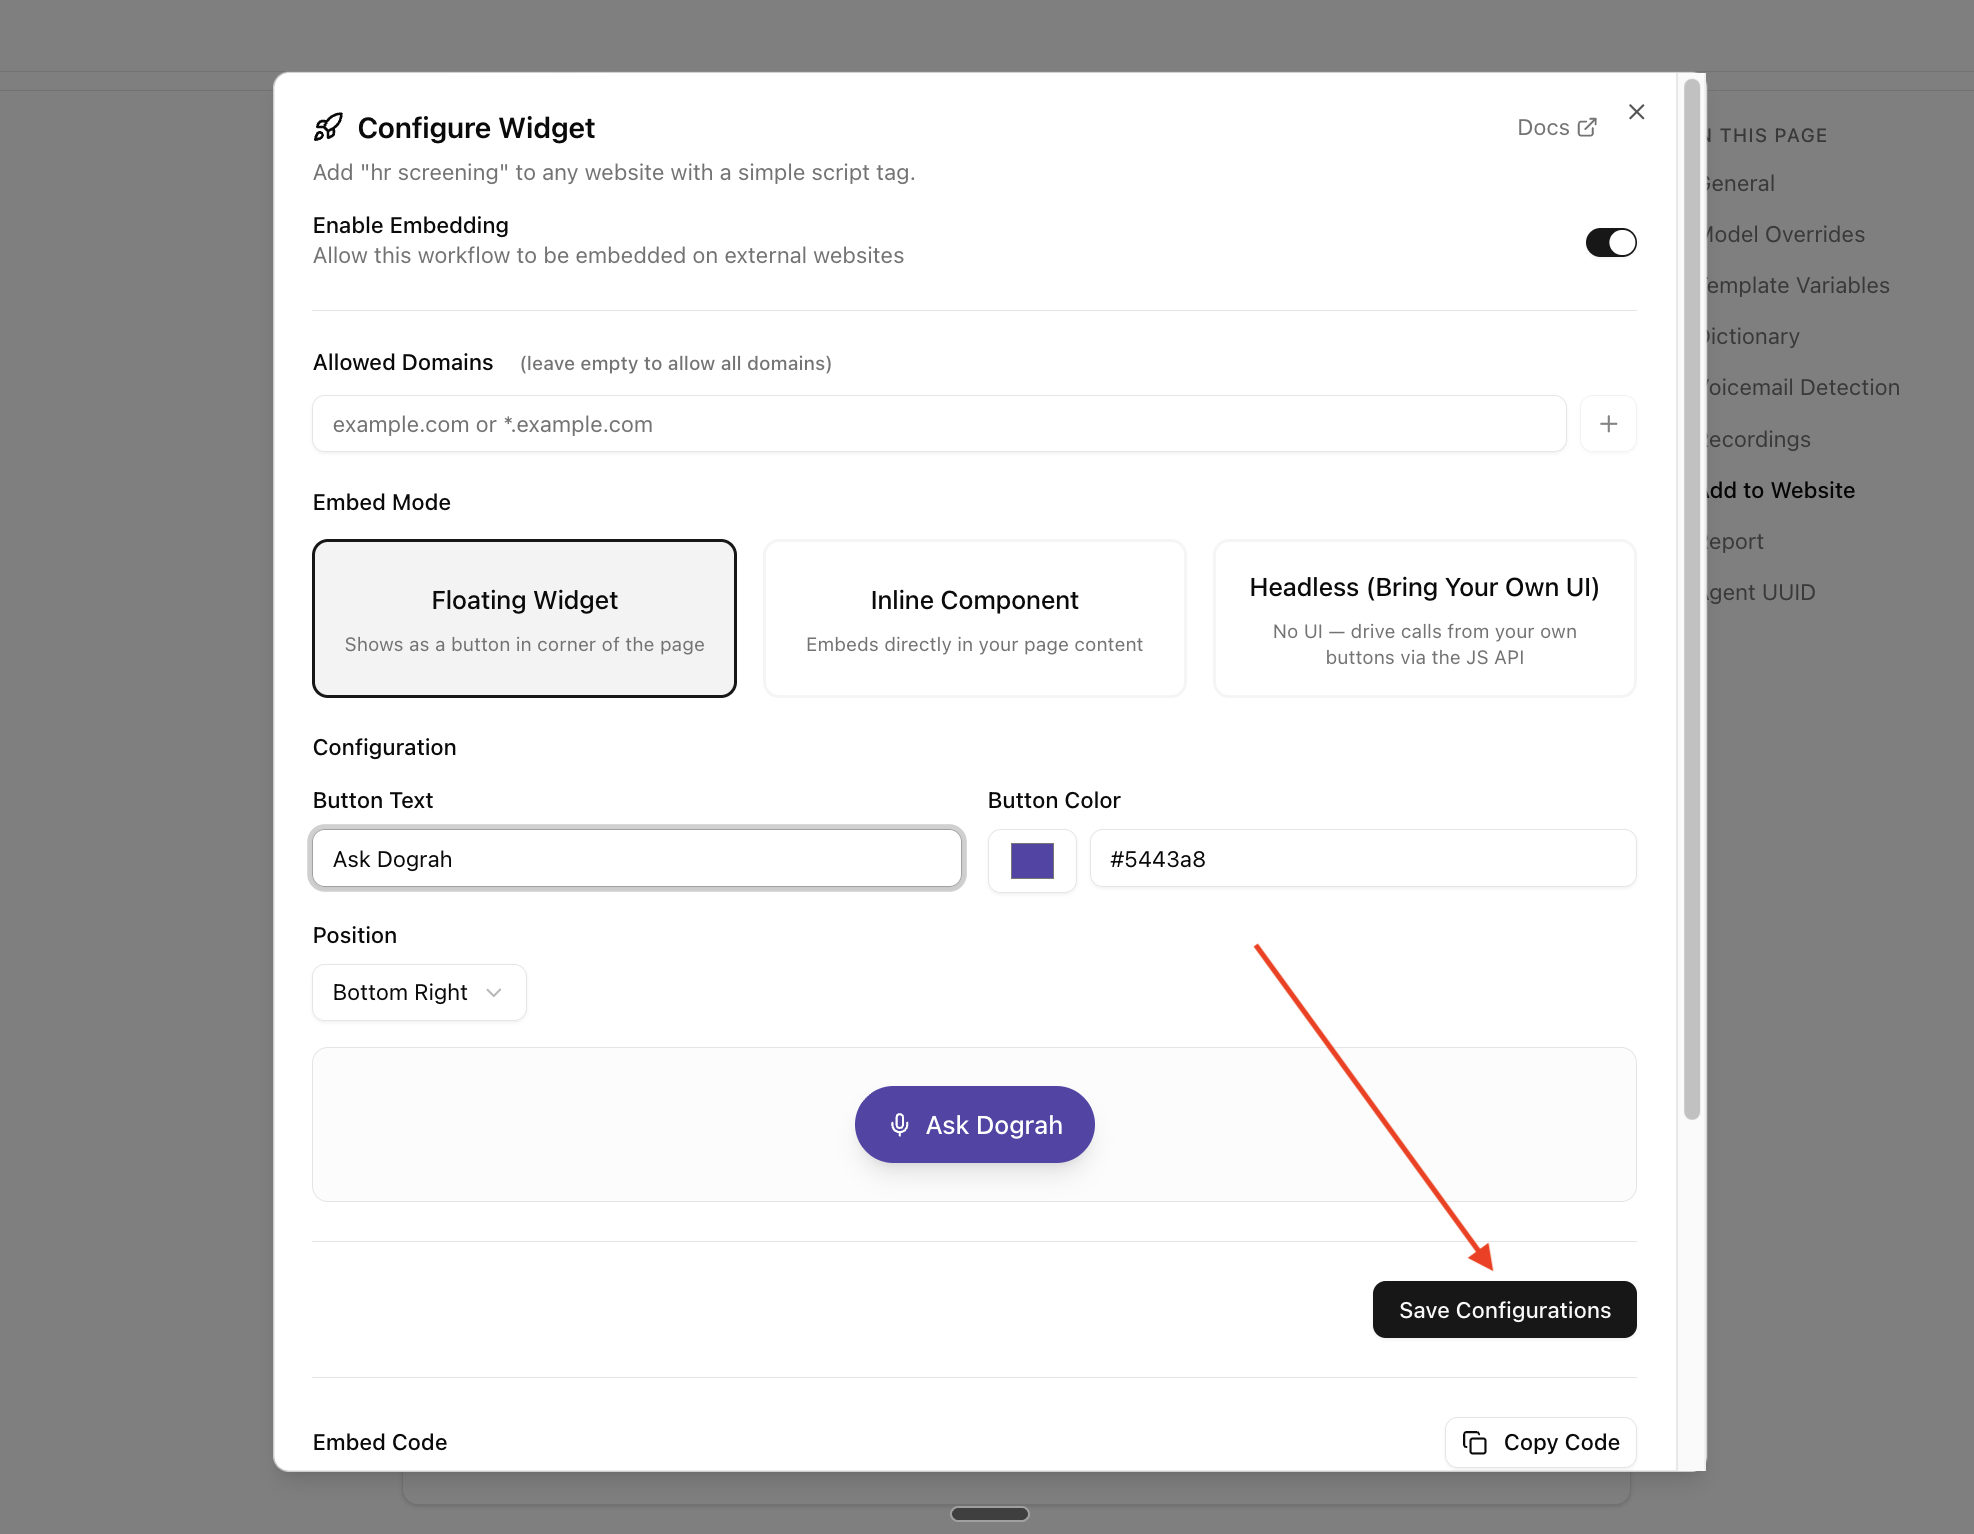
 Step 3: Enable embedding, add your website’s domain to Allowed Domains, choose Floating Widget, Inline Component, or Headless (Bring Your Own UI), customize the button (position, color, text) if applicable, and click Save Configurations.
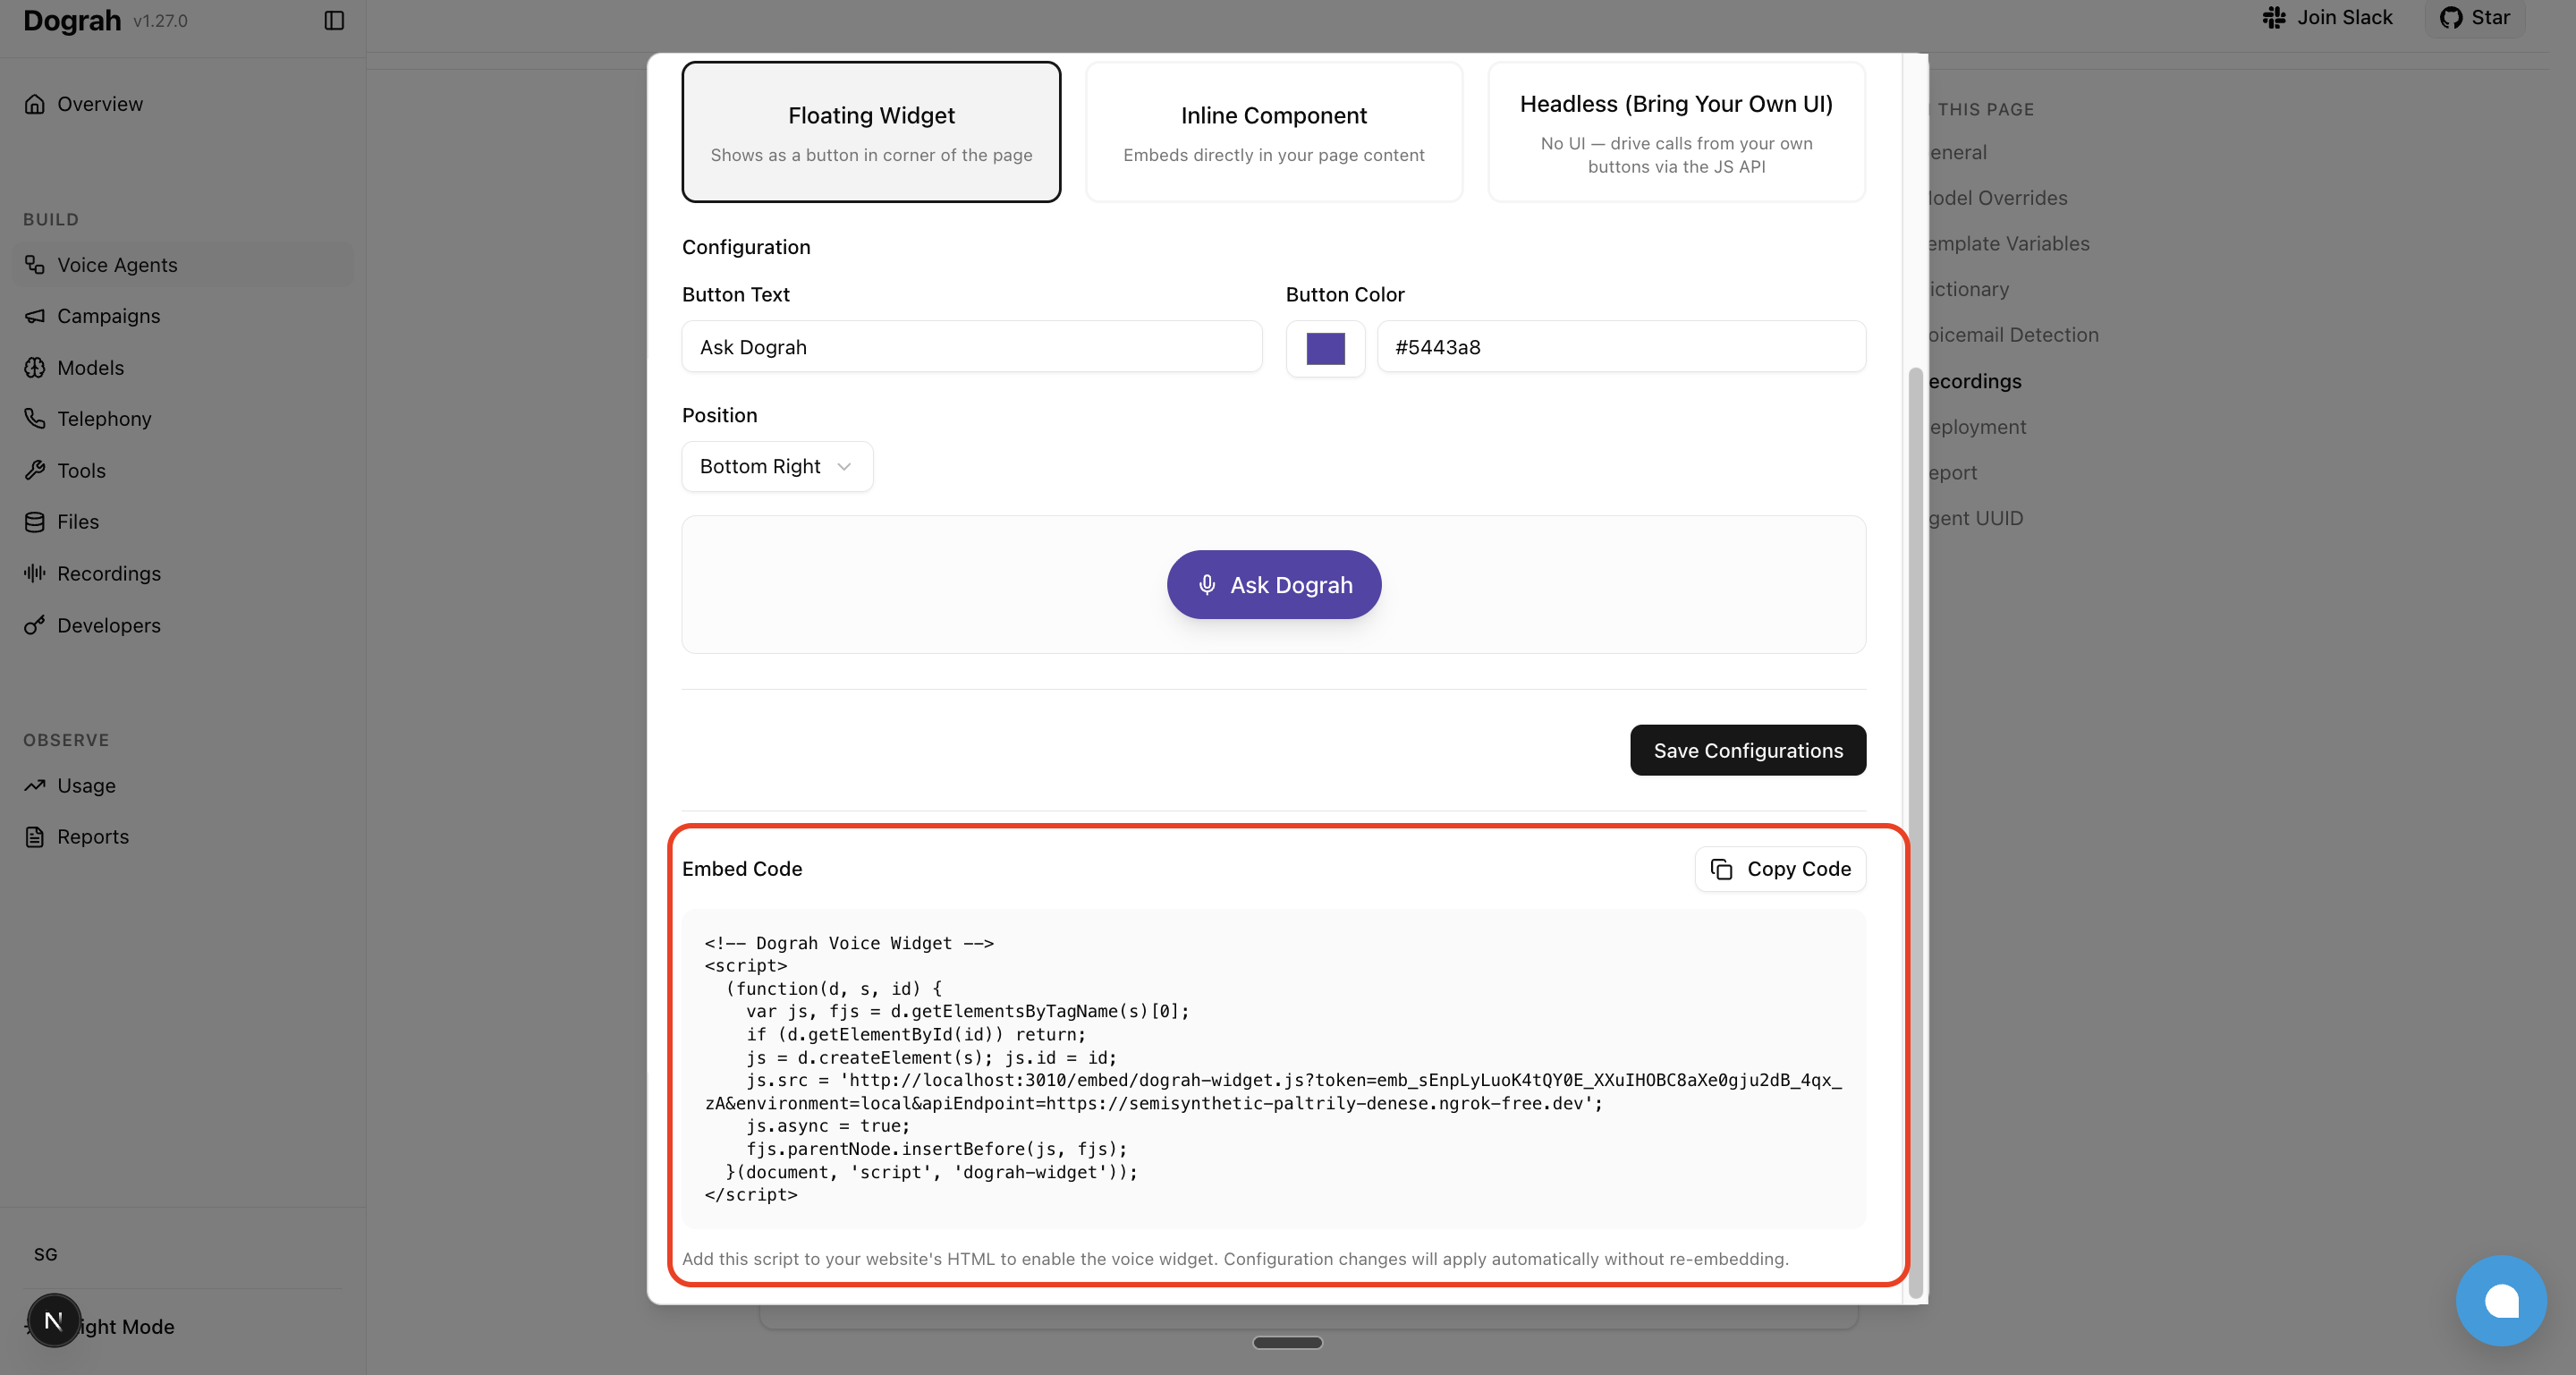
 Step 4: Copy the generated embed code and paste it into your web page to test your agent.
Embed modes
Prerequisites
These apply to all three modes:- Serve your page over HTTPS or from
http://localhost. Browsers refuse microphone access on plain HTTP origins orfile://. - If you set Allowed Domains in the dashboard, include your test origin (e.g.
localhost) — otherwise the widget’s config and signaling requests are rejected. Leave the list empty to allow all domains. - The embed snippet you copy from the dashboard is a single
<script>tag that loads asynchronously. The widget initializes itself once the script arrives.
Floating Widget
 Renders a pill-shaped button (microphone icon + text) anchored to a corner of the page. Clicking it starts a call; clicking again ends it. The button auto-updates its label and color across the call lifecycle: configured text → “Connecting…” → “End Call” → “Retry” on failure.
Configure Button Text, Button Color, and Position (top/bottom + left/right) from the dashboard.
The host page writes no JavaScript — pasting the embed snippet is the entire integration.
Renders a pill-shaped button (microphone icon + text) anchored to a corner of the page. Clicking it starts a call; clicking again ends it. The button auto-updates its label and color across the call lifecycle: configured text → “Connecting…” → “End Call” → “Retry” on failure.
Configure Button Text, Button Color, and Position (top/bottom + left/right) from the dashboard.
The host page writes no JavaScript — pasting the embed snippet is the entire integration.
Inline Component
 Renders a panel (status icon + status text + CTA button) inside a
 <div> you place in your page. Status changes update the panel in place.
Configure Button Text, Button Color, and Call to Action Text from the dashboard.
Plain HTML
Place a container<div> where you want the widget to render. The widget auto-attaches to it.
React
React mounts after the widget script may already have loaded, so initialize viainitInline on first mount and refresh on remount. Poll for window.BotrixAIWidget to handle the async script load.
Headless Mode
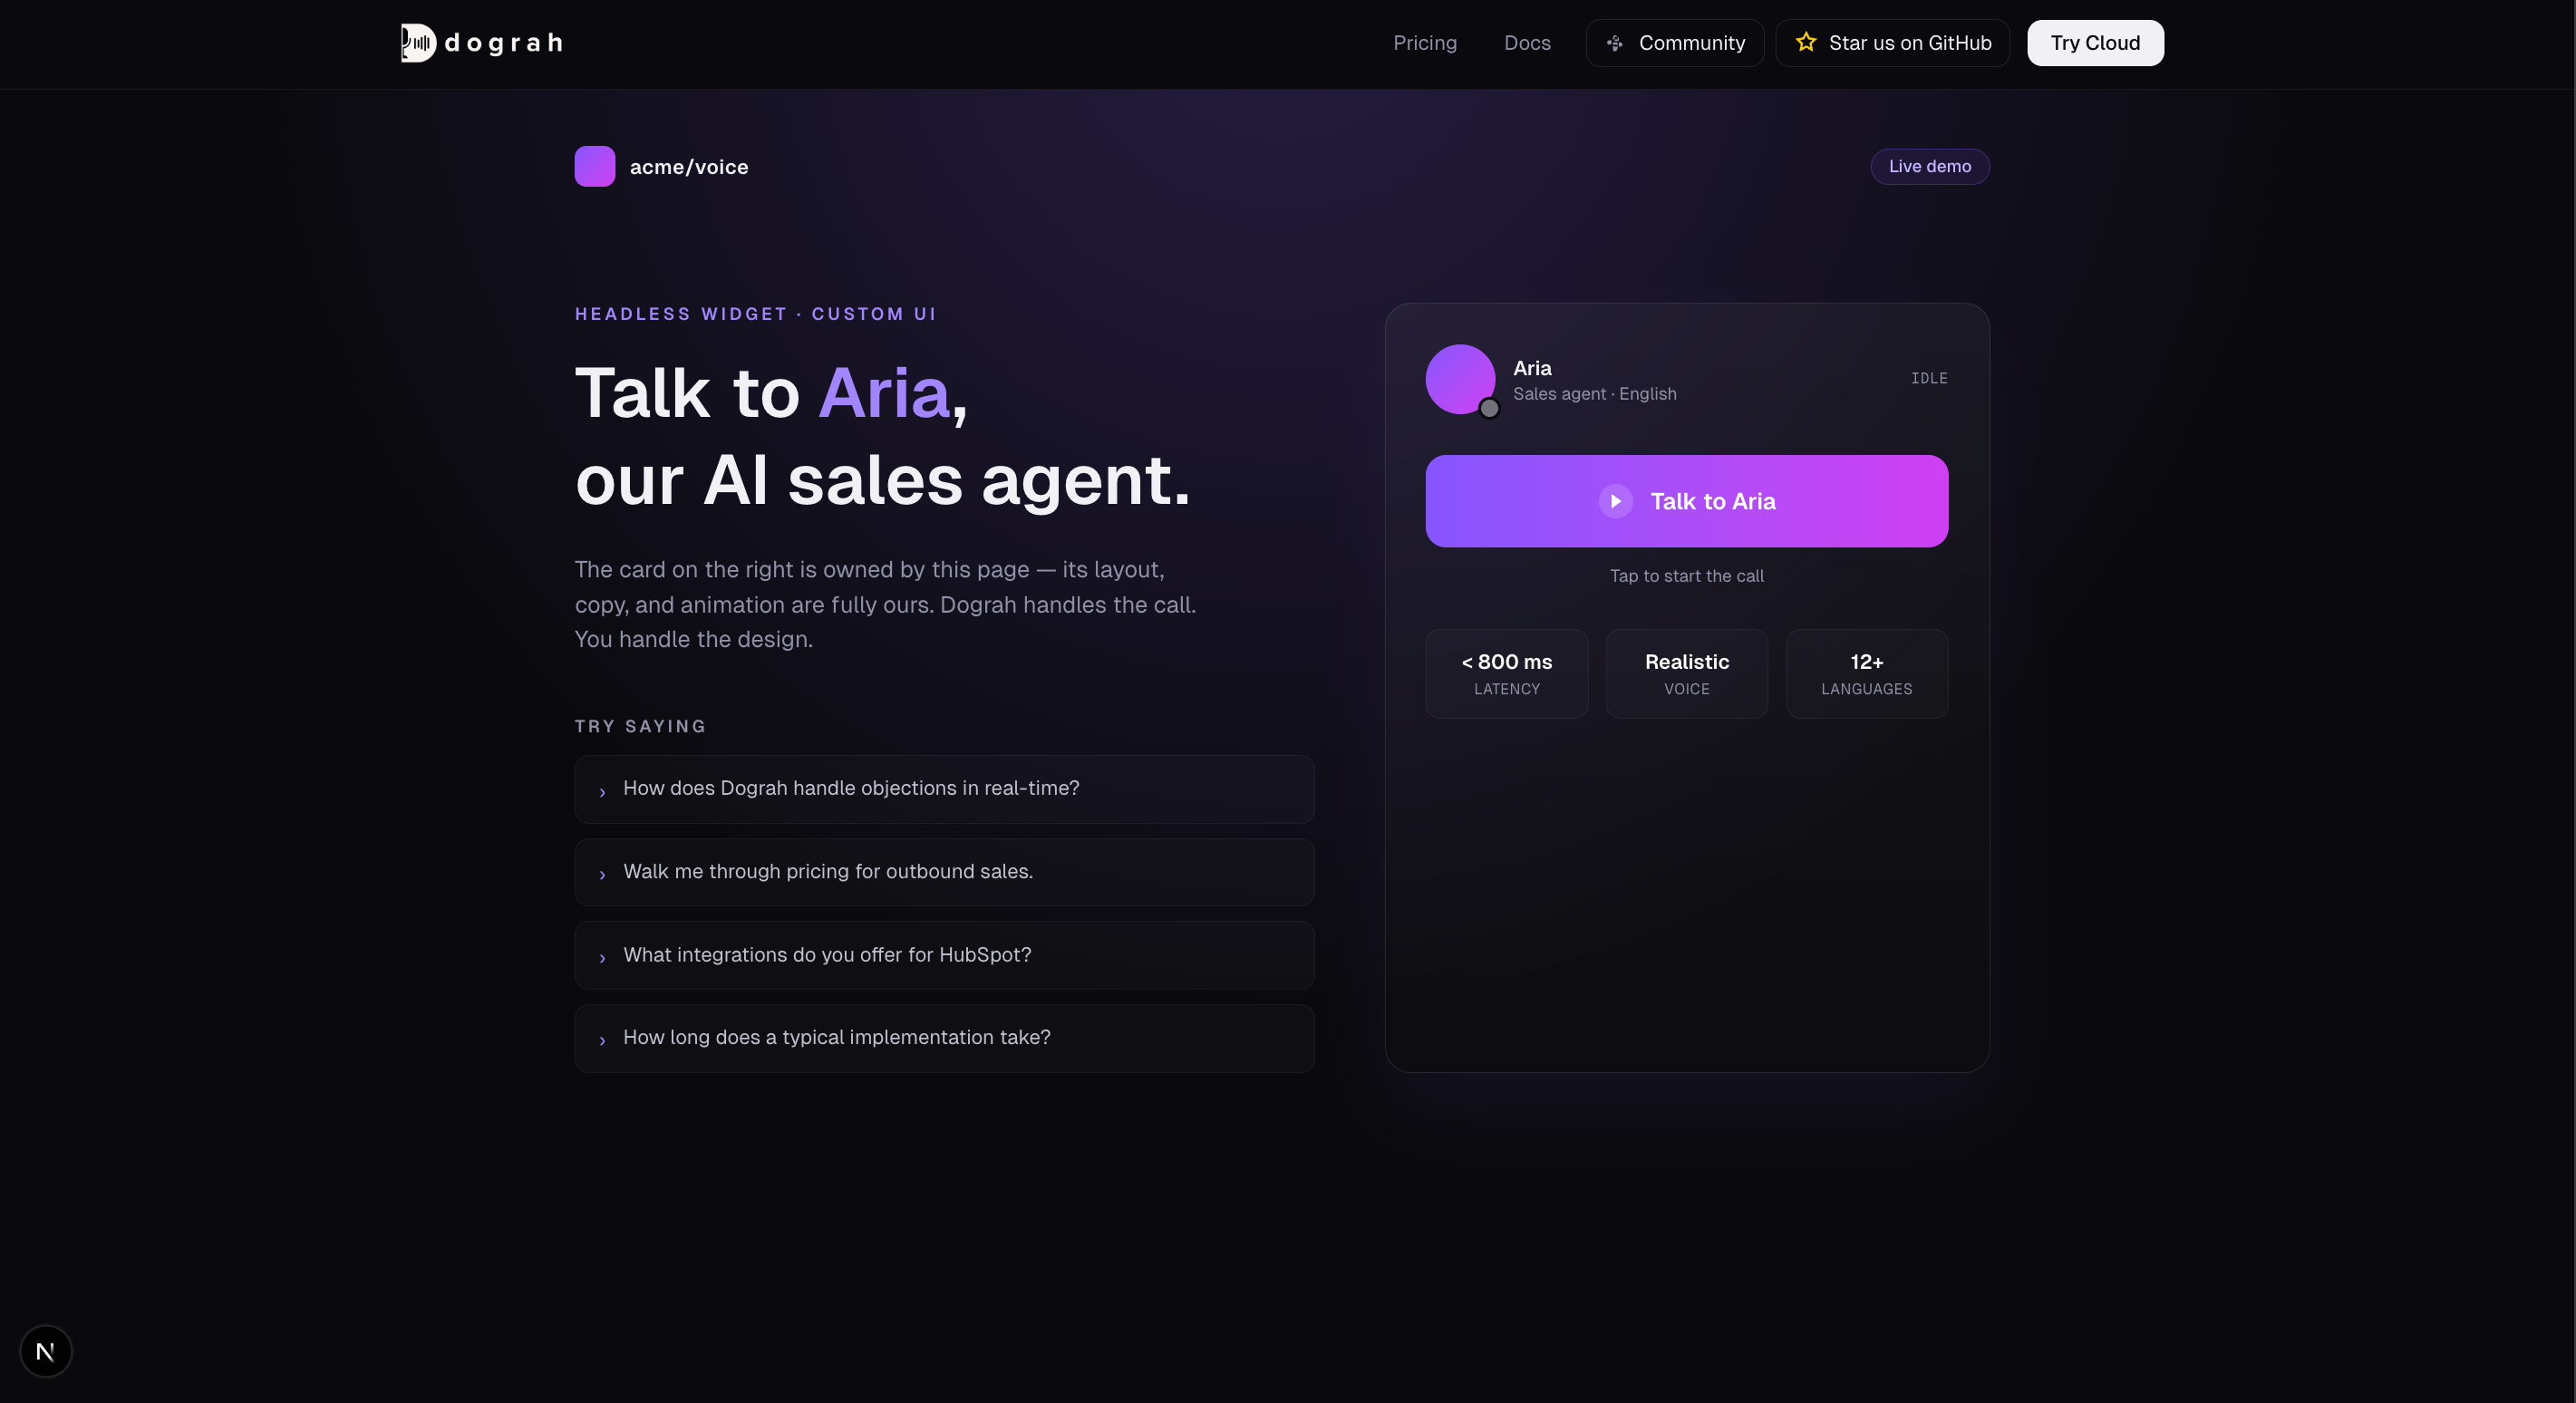 In Headless mode the widget injects no UI of its own. You render whatever buttons, banners or in-call indicators you want, and call the JavaScript API to start and end calls.
JavaScript API
The widget exposeswindow.BotrixAIWidget once its script has loaded.
Call status moves through
idle → connecting → connected → failed.
The embed script loads asynchronously, so
window.BotrixAIWidget may not
exist yet when your own code runs. Use optional chaining (?.) when
registering callbacks, or poll for it as the React example above does.